Windows Subsystem for Linux (GUI)の導入
Windows Subsystem for Linuxの有効化
VcXsrv Windows X Serverのインストール
結論:Windows Subsystem for Linuxを使えばVMware Playerとか使わなくてもいいかと思ったんですが、実行速度が遅いらしいんで様子見です。
Windows Subsystem for Linuxの有効化
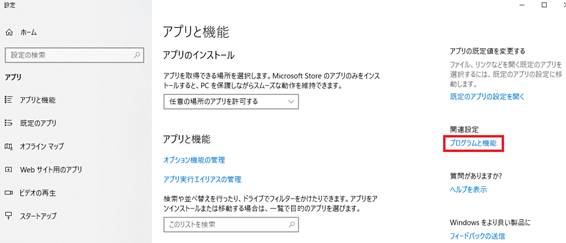
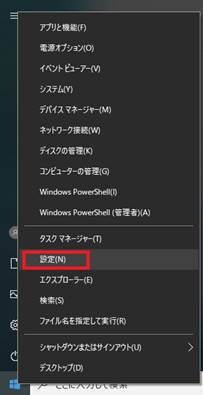
スタートボタンを右クリックし、アプリと機能をクリックします。

プログラムと機能をクリックします。
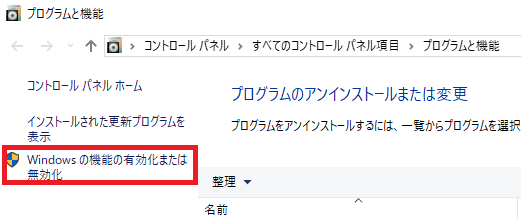
Windowsの機能の有効化または無効化をクリックします。
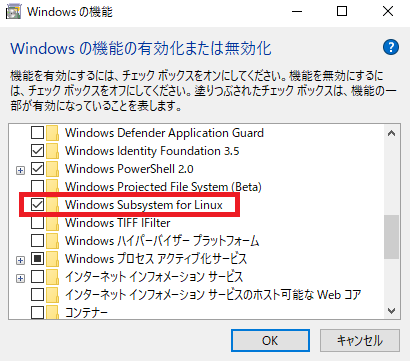
Windows Subsystem for Linuxを選択し、OKを押します。
インストールが始まります。終了後再起動をします。
スタートメニューから設定を選択します。
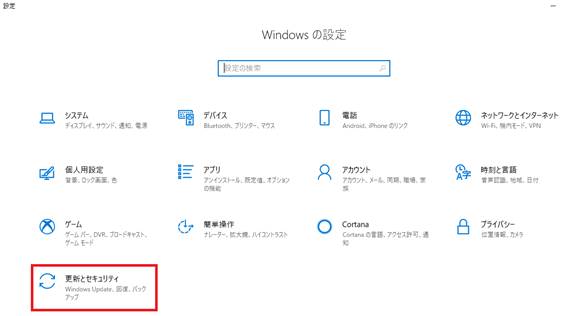
更新とセキュリティをクリックします。
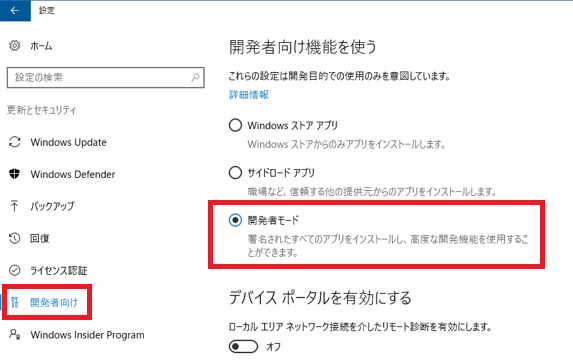
開発者向けをクリックし、開発者モードを選択します。
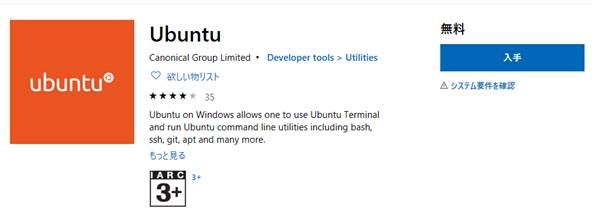
Ubuntuのインストール
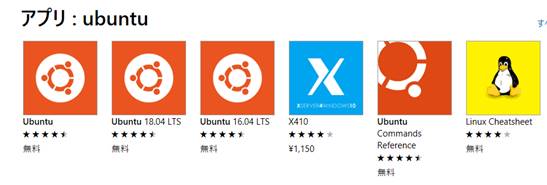
Microsoft Storeから検索でubuntuを選択し、Ubuntuをクリックします。
入手をクリックします。
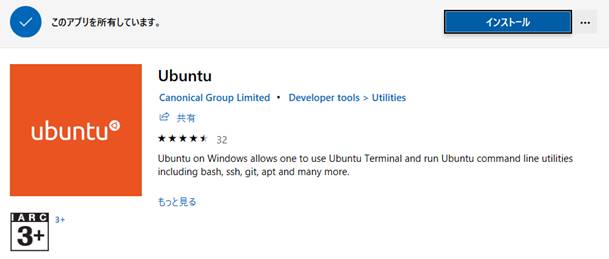
インストールをクリックします。
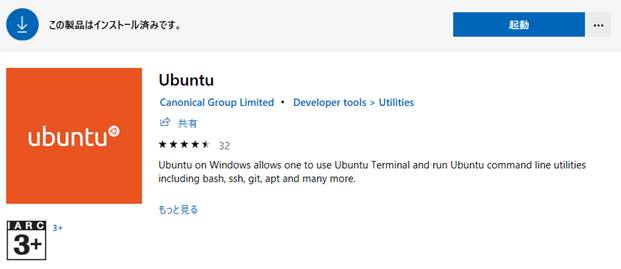
起動をクリックします。
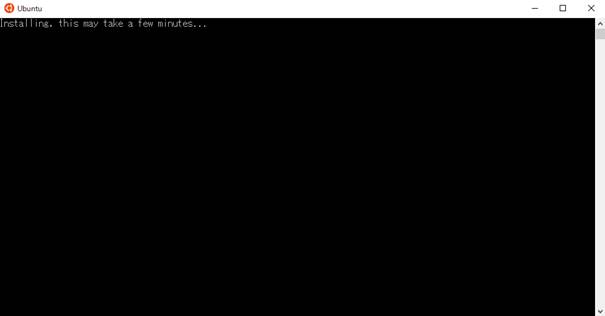
ちょっと時間がかかります。
適当にEnterをして、usernameとpasswordを適当に決めます。
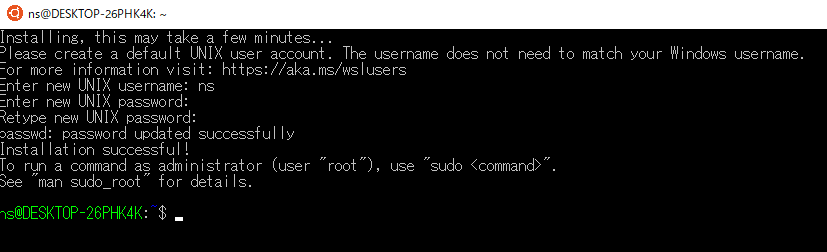
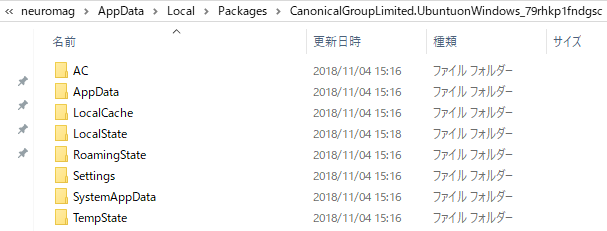
Ubuntuのインストール先は/Users/Windowsのユーザーネーム/AppData/Local/Packages/CanonicalGroupLimited…..だそうです。
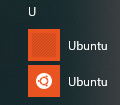
スタートメニューにUbuntuがあります。なぜか2個になってしまった。
一旦Ubuntuを終了して、スタートメニューからUbuntuを起動してみます。

少しコマンドを打ってみます。
To run a command as administrator
(user "root"), use "sudo
<command>".
See "man sudo_root"
for details.
ns@DESKTOP-26PHK4K:~$ pwd
/home/ns
ns@DESKTOP-26PHK4K:~$
ls
ns@DESKTOP-26PHK4K:~$
ルートディレクトリにします。
ns@DESKTOP-26PHK4K:~$ pwd
/home/ns
ns@DESKTOP-26PHK4K:~$
ls
ns@DESKTOP-26PHK4K:~$
cd /
ns@DESKTOP-26PHK4K:~$ ls
bin boot dev
etc
home init lib
lib64 media mnt opt
proc root run
sbin
snap srv sys
tmp usr var
ns@DESKTOP-26PHK4K: ~$
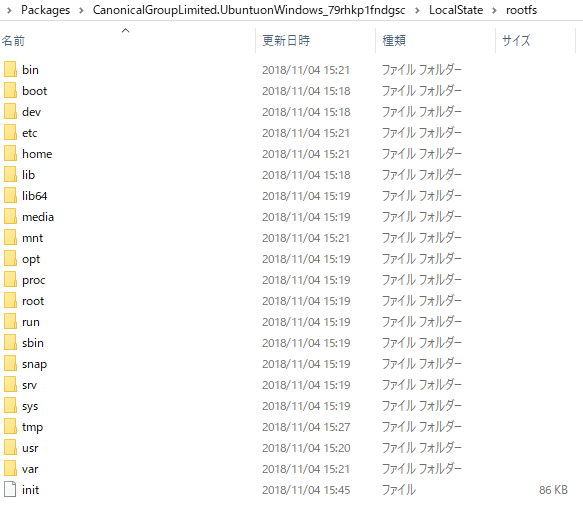
/Users/Windowsのユーザーディレクトリ/AppData/Local/Packages/CanonicalGroupLimited.Ubuntu…/LocalState/roofsとルートディレクトリが同じもののようです。
Windows側からUbuntuのファイル操作をすると壊れてしまうそうです。
Ubuntu側からWindowsのファイル操作をすることになります。
I:\akiraにアクセスしてみます。
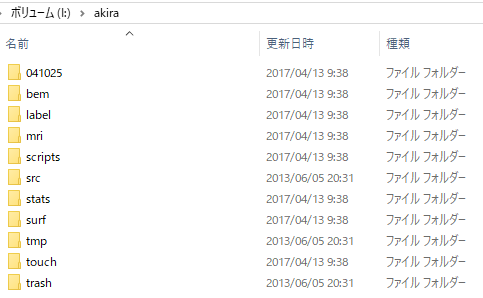
ns@DESKTOP-26PHK4K:~$ cd
/mnt/i/akira
ns@DESKTOP-26PHK4K:~$ /mnt/i/akira$ ls
041025 bem label mri scripts src stats surf tmp touch trash
ns@DESKTOP-26PHK4K:~$ /mnt/i/akira$
cd /home/ns/
ns@DESKTOP-26PHK4K:~$
Ubuntuその他の更新
定期的に更新したほうがいいそうです。
sudo apt updateとsudo apt upgradeを実行します。なおapt-get update、apt-get upgradeは古いそうです。
ns@DESKTOP-26PHK4K:~$ sudo apt update
[sudo] password for ns:
Hit:1
http://archive.ubuntu.com/ubuntu bionic InRelease
Get:2
http://security.ubuntu.com/ubuntu bionic-security InRelease
[83.2 kB]
中略
Get:24
http://archive.ubuntu.com/ubuntu bionic-backports/universe Translation-en [1200 B]
Fetched 15.8 MB in 46s (340 kB/s)
Reading package lists... Done
Building dependency tree
Reading state information... Done
106 packages can be upgraded. Run 'apt list --upgradable' to see them.
ns@DESKTOP-26PHK4K:~$
途中でYを押します。
ns@DESKTOP-26PHK4K:~$ sudo apt upgrade
Reading package lists... Done
Building dependency tree
中略
Need to get 42.1 MB of archives.
After this operation, 686 kB of
additional disk space will be used.
Do you want to continue? [Y/n] Y
upgradeのほうは結構時間がかかります。
Do you want to continue? [Y/n] Y
Get:1
http://archive.ubuntu.com/ubuntu bionic-updates/main amd64 base-files amd64
10.1ubuntu2.3 [60.4 kB]
Get:2
http://archive.ubuntu.com/ubuntu bionic-updates/main amd64 bsdutils
amd64 1:2.31.1-0.4ubuntu3.2 [60.3 kB]
Get:3
http://archive.ubuntu.com/ubuntu bionic-updates/main amd64 dpkg
amd64 1.19.0.5ubuntu2.1 [1140 kB]
中略
Get:85
http://archive.ubuntu.com/ubuntu bionic-updates/main amd64 update-manager-core
all 1:18.04.11.6 [8484 B]
Get:86
http://archive.ubuntu.com/ubuntu bionic-updates/main amd64
python3-problem-report all 2.20.9-0ubuntu7.4 [9776 B]
Unpacking man-db
(2.8.3-2ubuntu0.1) over (2.8.3-2) ...
Preparing to unpack
.../10-uuid-runtime_2.31.1-0.4ubuntu3.2_amd64.deb ...
Unpacking uuid-runtime
(2.31.1-0.4ubuntu3.2) over (2.31.1-0.4ubuntu3.1) ...
中略
Setting up update-manager-core
(1:18.04.11.6) ...
Processing triggers for libc-bin (2.27-3ubuntu1)
...###############################################################.]
Processing triggers for initramfs-tools (0.130ubuntu3.5) ...
ns@DESKTOP-26PHK4K:~$
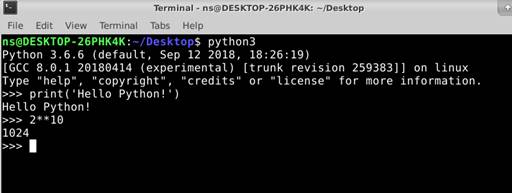
pythonを起動してみます。
pythonでなく、python3で起動します。
ns@DESKTOP-26PHK4K:~$
python
Command 'python' not found, but can
be installed with:
sudo apt install python3
sudo apt install python
sudo apt install python-minimal
You also have python3 installed, you can run 'python3' instead.
ns@DESKTOP-26PHK4K:~$
python3
Python 3.6.6 (default, Sep 12 2018,
18:26:19)
[GCC 8.0.1 20180414 (experimental)
[trunk revision 259383]] on linux
Type "help",
"copyright", "credits" or "license" for more
information.
>>> print('Hello
Python!')
Hello Python!
>>> 2+5
7
>>>
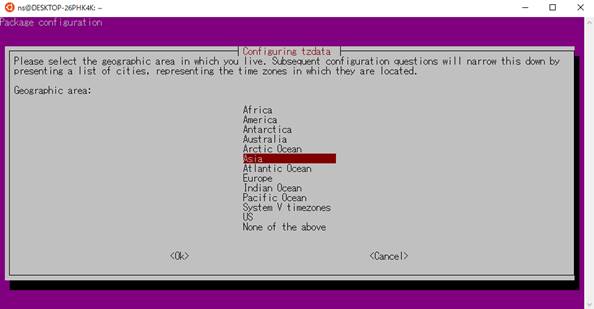
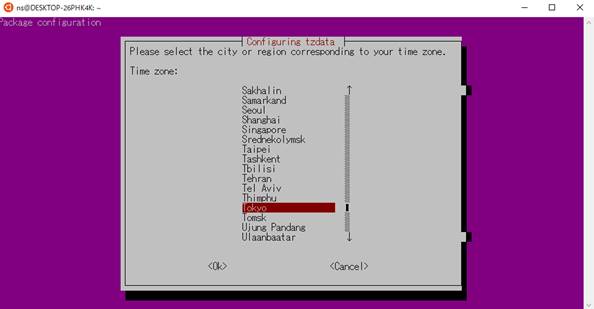
タイムゾーンを東京にする
ns@DESKTOP-26PHK4K:~$ sudo dpkg-reconfigure tzdata
Asiaを選択してEnterを押します。
Tokyoを選択してEnterを押します。
ns@DESKTOP-26PHK4K:~$ sudo dpkg-reconfigure tzdata
Current default time zone:
'Asia/Tokyo'
Local time is now: Thu Nov 8 10:25:51
JST 2018.
Universal Time is now: Thu Nov 8 01:25:51 UTC 2018.
ns@DESKTOP-26PHK4K:~$
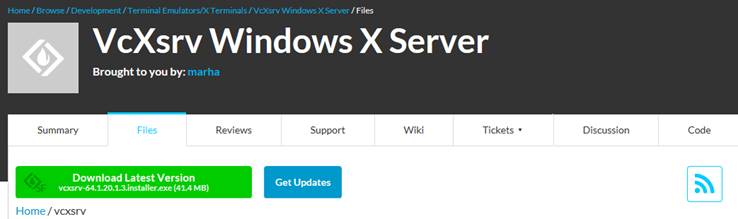
VcXsrv Windows X Serverのインストール
このままだとUbuntuでGUIを使うことはできません。
https://sourceforge.net/projects/vcxsrv/files/vcxsrv/
からVcXsrv Windows X Serverをインストールします。
保存をクリックします。

実行をクリックします。

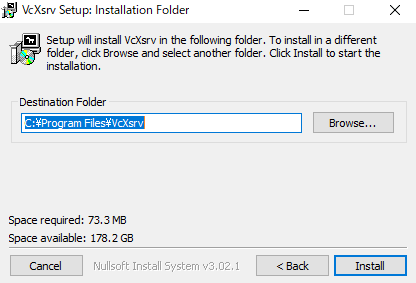
Nextをクリックします。
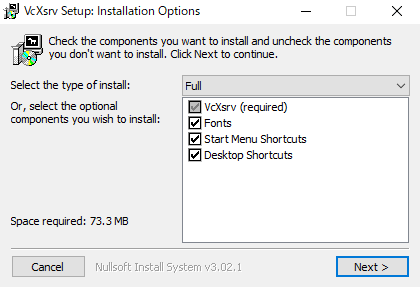
Installをクリックします。
Closeをクリックします。

スタートメニューにXLaunchが追加されました。
![]()
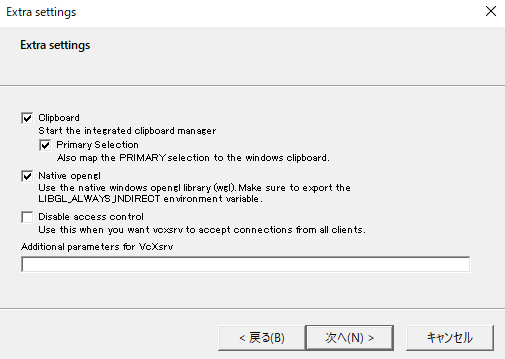
好みですが、One large Windowを選択し、次へ、をクリックします。
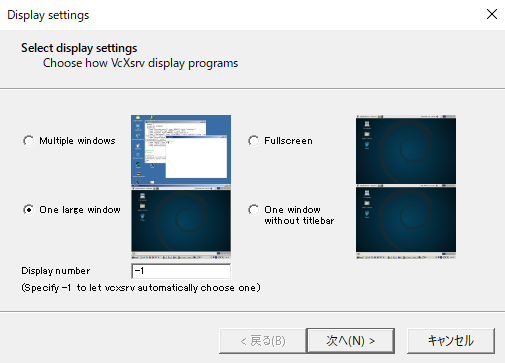
次へクリックします。
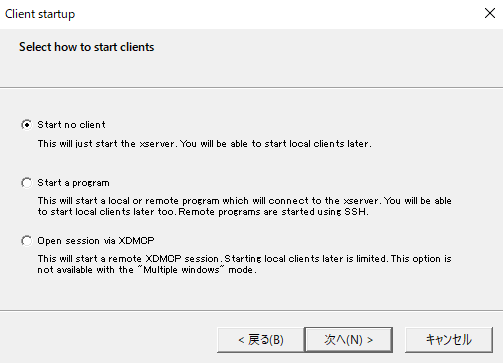
次へをクリックします。
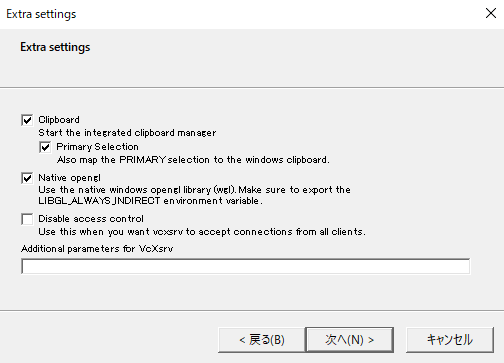
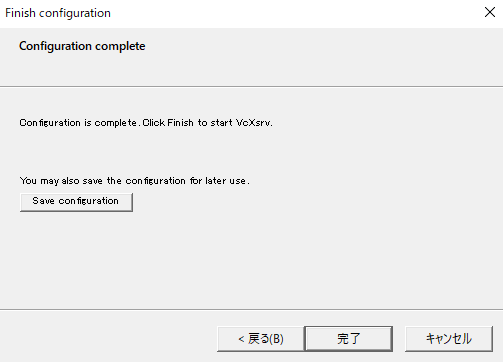
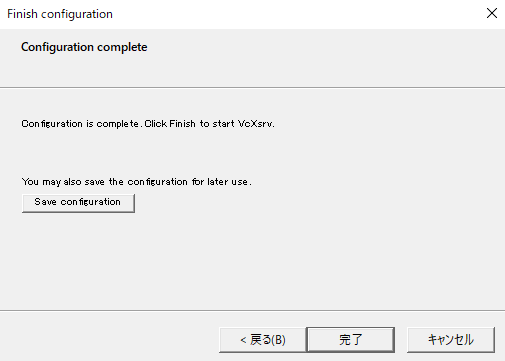
完了をクリックします。
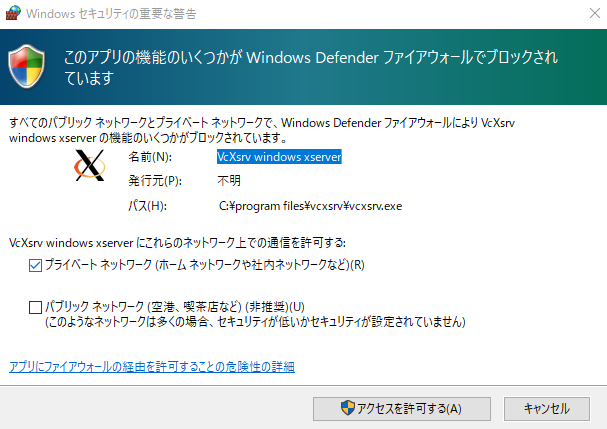
アクセスを許可するをクリックします。
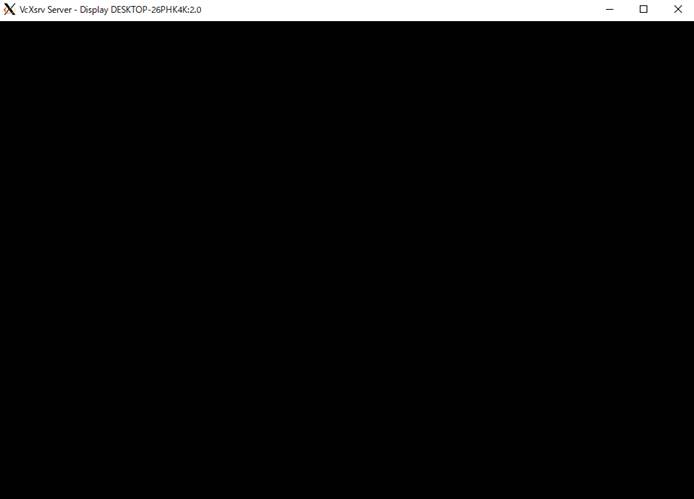
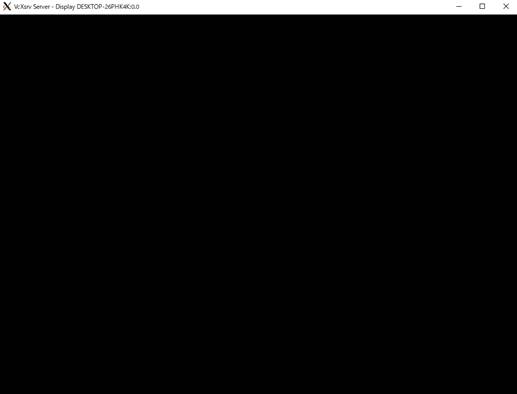
黒枠しか表示されません。
`Windowを閉じても右下のインジケータに![]() がある場合は、プログラムは終了していません。
がある場合は、プログラムは終了していません。
xfceのインストール
xfceは軽量のデスクトップ環境です。
sudo apt install xfce4-terminalを実行します。途中でYを押します。
ns@DESKTOP-26PHK4K:~$ sudo apt install xfce4-terminal
[sudo] password for ns:
Reading package lists... Done
Building dependency tree
Reading state information... Done
The following additional packages
will be installed:
中略
Need to get 14.6 MB of archives.
After this operation, 71.0 MB of
additional disk space will be used.
Do you want to continue? [Y/n] Y
中略
Processing triggers for libc-bin (2.27-3ubuntu1) ...
Processing triggers for systemd (237-3ubuntu10.4) ...
Processing triggers for ureadahead (0.100.0-20) ...
Processing triggers for
libgdk-pixbuf2.0-0:amd64 (2.36.11-2) ...
ns@DESKTOP-26PHK4K:~$
sudo apt install xfce4を実行します。途中でYを押します。
ns@DESKTOP-26PHK4K:~$ sudo apt install xfce4
Reading package lists... Done
Building dependency tree
Reading state information... Done
The following additional packages
will be installed:
中略
Need to get 85.9 MB of archives.
After this operation, 447 MB of
additional disk space will be used.
Do you want to continue? [Y/n] Y
中略
Processing triggers for initramfs-tools (0.130ubuntu3.5) ...
Processing triggers for
dictionaries-common (1.27.2) ...
Processing triggers for dbus (1.12.2-1ubuntu1) ...
ns@DESKTOP-26PHK4K:~$
Ubuntu (GUI)の起動
XLaunchを起動します。
![]()
One large window、Display numberは0にし、次へを押します。

次へを押します。

次へを押します。
完了を押します。
黒い画面があるだけです。
Ubuntuを起動します。
![]()
最後に環境変数の設定をします。以下をタイプします。
ns@DESKTOP-26PHK4K:~$
export DISPLAY=:0.0
ns@DESKTOP-26PHK4K:~$
export LIBGL_ALWAYS_INDIRECT=1
ns@DESKTOP-26PHK4K:~$
startxfce4
Enterを押します。
ns@DESKTOP-26PHK4K:~$
startxfce4
/usr/bin/startxfce4:
X server already running on display :0.0
_IceTransmkdir:
Owner of /tmp/.ICE-unix
should be set to root
gpg-agent[318]: WARNING: "--write-env-file" is an obsolete option - it has no effect
中略
(xfce4-session:307):
Gtk-WARNING **: 11:45:47.471: Unable to locate theme engine in module_path: "pixmap",
(xfce4-session:307):
Gtk-WARNING **: 11:45:47.472: Unable to locate theme engine in module_path: "pixmap",
中略
** (xfdesktop:329):
WARNING
**: 11:45:47.750:
Failed to get system bus: Could not connect: No such file or directory
Use default configをクリックします。
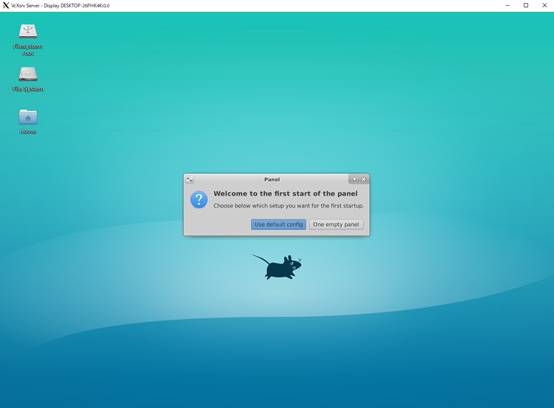
GUIのUbuntuが表示されました。

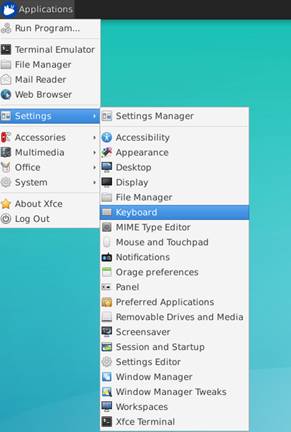
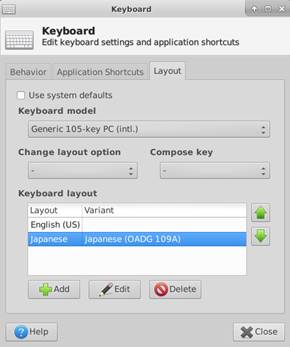
キーボードの日本語化
Applications→Settings→Keyboardを選択します。
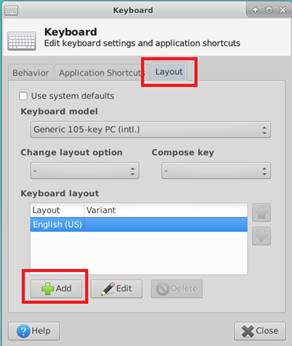
LayoutをクリックしAddをクリックします。
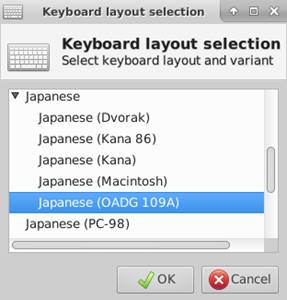
Japanese (OADG 109A)を選択し、OKをクリックします。
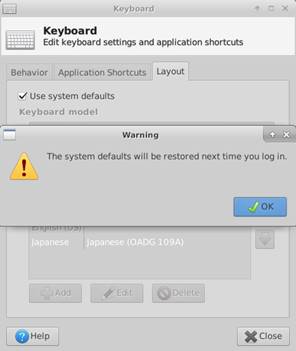
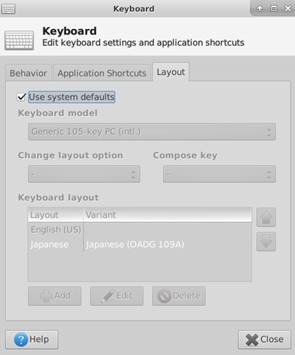
Japanese (OADG 109A)を選択し、Use system defaultsをクリックします。
OKをクリックします。
Closeをクリックします。
XLaunchを終了します。Exitを押します。

XLaunchを起動します。
![]() `
`
Ubuntuかxfceを再起動します。startxfce4とタイプしてEnterします。
ns@DESKTOP-26PHK4K:~$
(xfce4-terminal:553):
libxfce4ui-WARNING
**: 12:25:15.117:
Disconnected from session manager.
xfce4-panel: Fatal IO error 11 (Resource
temporarily unavailable) on X server :0.0.
xfsettingsd: Fatal IO error 11 (Resource
temporarily unavailable) on X server :0.0.
xfdesktop: Fatal IO error 11 (Resource
temporarily unavailable) on X server :0.0.
wrapper-1.0: Fatal IO error 11 (Resource
temporarily unavailable) on X server :0.0.
wrapper-1.0: Fatal IO error 11 (Resource
temporarily unavailable) on X server :0.0.
ns@DESKTOP-26PHK4K:~$
ns@DESKTOP-26PHK4K:~$
startxfce4
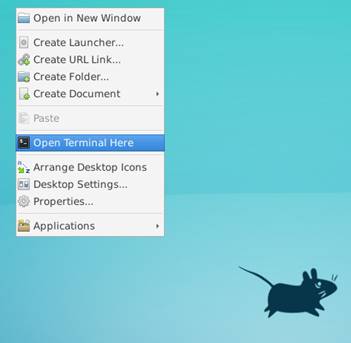
デスクトップを右クリックし、Open Terminal Hereを選択します。
pythonを起動します。python3で起動しました。日本語キーボード配列になっています。